For these steps in our design process, we worked on promoting and finalizing our project. It was a team effort to find ways to convey our work and the viability of our product. We completed this design step by working with our mentors, and a lot of collaboration and cooperation with each other. On top of our group assignments, we were also tasked with individual programming activities for 3D modeling and understanding how to use online circuits. Below are the different parts to our Design Step 6 & 7.
|
Step 6&7, Part 1
|
Step 6&7, Part 2
|
There were a lot of assignments that we needed to complete for these design steps. With the time we had, the main goal was to focus our energy in producing our best work. One main challenge that we collectively faced, as a group, was testing our product virtually. There are many resources that are out there, and we researched/collaborated with many people to find the best one to use. Again, due to the current situation with distance learning we were forced to create our prototype/product virtually. Zoom can make things challenging, but I am very proud of how my group is handling the challenges we are faced this semester.
In order to efficiently work, we once again split up our projects into two main steps. The buildable functioning prototypes and developing a product website were the tasks to complete in part 1. In part 2 we had to complete prototype performance testing and create a corresponding report, along with finishing online circuit tutorials on Tinkercad. We had roughly 2 weeks to complete all of the steps above, and finish up all of the past steps of the previous design step. However, my team worked diligently to meet the deadlines, communicate with each other, and reach out to our mentors. The rest of this write up will dive into the specifics of all the work we produced in these design steps.
In order to efficiently work, we once again split up our projects into two main steps. The buildable functioning prototypes and developing a product website were the tasks to complete in part 1. In part 2 we had to complete prototype performance testing and create a corresponding report, along with finishing online circuit tutorials on Tinkercad. We had roughly 2 weeks to complete all of the steps above, and finish up all of the past steps of the previous design step. However, my team worked diligently to meet the deadlines, communicate with each other, and reach out to our mentors. The rest of this write up will dive into the specifics of all the work we produced in these design steps.
Step 6 & 7, Part 1
The first assignment that we worked on was creating buildable functioning prototypes and models. This involved designing models of what our product will look like, and blueprints/sketches of the product itself. We followed the directions below to direct our efforts in design our prototypes.
Obviously, we were not able to make physical prototypes, but we did work with what we had available to us. We used this opportunity to develop blueprints of what our product will look like, these were also our 2D sketches. A blueprint enables you to design with the big picture in mind. In this way, you can ensure you reach every milestone and build consistency throughout the curriculum, even when faced with uncertainty in the project. This was an important mindset that we took with us throughout this project, so we can always find ways to make our work better.
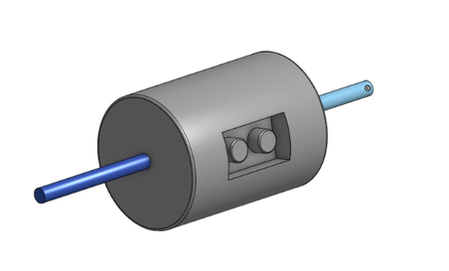
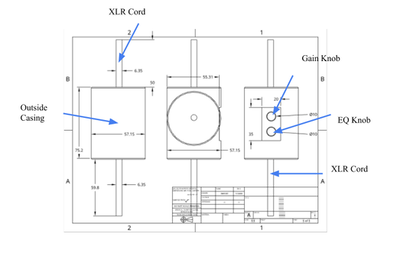
We used the online software Onshape to develop 3D models of our product, the JEDD 2021.0. In a nutshell, it is a project-level container that holds your Part Studios, Assemblies and Drawings. This is a software we have been learning about in class individually, as we navigate tutorials on the functions the service provides. The models we created, however, were original designs for our product. Below is a rendered still of our vision for the JEDD 2021.0, with a corresponding detailed blueprint.
- Detailed 3D “buildable functioning prototypes” of your capstone projects, including all subsystems, fastening solutions, and alternative design possibilities. The models must be realistic and represent real physical objects, obeying the laws of physics.
- If possible physical prototypes.
- Detailed 2D buildable blueprints.
Obviously, we were not able to make physical prototypes, but we did work with what we had available to us. We used this opportunity to develop blueprints of what our product will look like, these were also our 2D sketches. A blueprint enables you to design with the big picture in mind. In this way, you can ensure you reach every milestone and build consistency throughout the curriculum, even when faced with uncertainty in the project. This was an important mindset that we took with us throughout this project, so we can always find ways to make our work better.
We used the online software Onshape to develop 3D models of our product, the JEDD 2021.0. In a nutshell, it is a project-level container that holds your Part Studios, Assemblies and Drawings. This is a software we have been learning about in class individually, as we navigate tutorials on the functions the service provides. The models we created, however, were original designs for our product. Below is a rendered still of our vision for the JEDD 2021.0, with a corresponding detailed blueprint.
|
|
After designing what we wanted our product to look like in Onshape, we complied all of our blueprints and stills into a document for our teacher. The document contains images such as the two above, an inside look of the circuitry we developed, and a simplified blueprint of the outside. You can find the document I am referring to below this description.
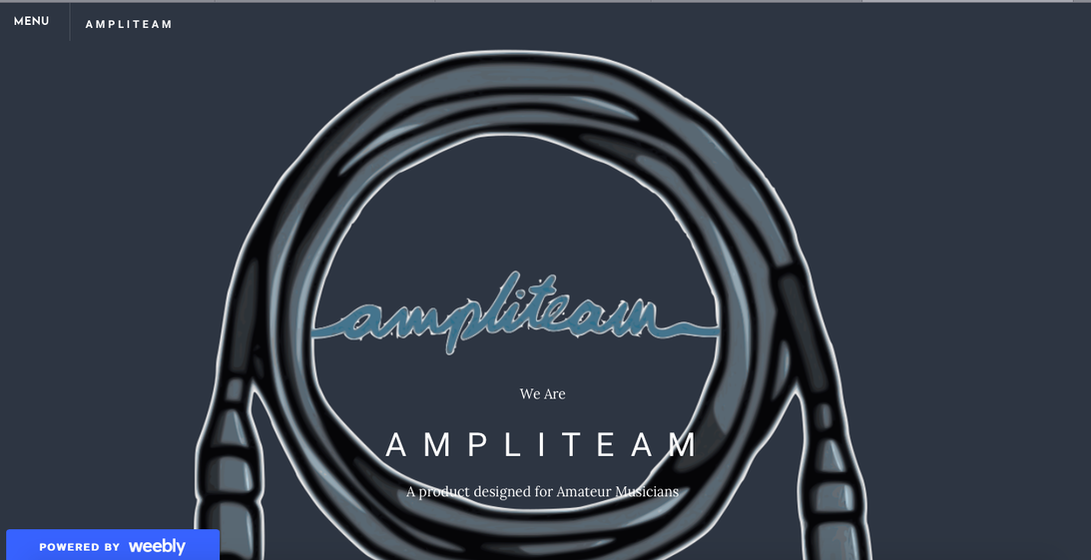
The next assignment we tackled in this design part was developing a product website. This was an important marketing move we wanted to make. A product page is what defines the features, manufacturer, uses and a lot more, about a certain product, in e-commerce. It is a page on an e-commerce website that defines a product in its entirety. This allows the users to look deeply into what a product offers and how it will benefit them once they buy it.
A product page is an important aspect of an e-commerce website. This is, for the most part, what the users come to see on an e-commerce website. The product page offers users all the important information about the product. They get to read about the feature, get to witness different opinions from different users through testimonials, get an overview of the product in action, and a lot more. A product page can be thought of as a micro-site: this is because it contains several sub-pages that contain information about the product. This page not only drives the buying decision of customers but also helps them after the purchase has been made. It contains information about the usage of the product, the best practices while using it, and even things that users must avoid while using the product in order to remain safe from any harm.
Using this knowledge and strategy, we designed our own website to promote the JEDD 2021.0. Our website has main pages, sub pages, and caters to the promotion we desired. Below is a summary of the pages/services offered from our website.
|
Website Services
|
|
Step 6 & 7, Part 2
The next phase of our design steps was to run function and performance testing. A performance test report provides an overall test result, analysis and recommendations to the project team or client from application's performance perspective. The report/document helps to take the GO / NO-GO decision for the whole application functionality.
This prototype performance test is meant as a proof of concept for our machine. Our wanted functionality includes a boost in voltage from the preamp circuit as well as equalization from the tilt EQ circuit. We had already tested out the preamp circuit and had done experiments with EQ circuits, now we needed to test both of our circuits and how they interact with input sine waves. Once we understood this and proved it worked, we could then be ready to, in the future, test a real prototype using real mic level inputs. For now though we used onshape and tinkercad in order to test our product and how it might be able to achieve our wanted functionality.
This test is meant as a full body proof of concept, meaning all parts of the machine needed to function properly. We decided on our constants, this would be the power supply, the preamp level, the adjustments of the resistors in separation from the function of the potentiometers. After this we needed a series of trials using different variables, this would include frequency of inputs, levels of gain, and adjustments of EQ. Once we saw that the circuits worked in theory we needed to make sure that the body of the machine could interact with the circuits properly so we used 3D modeling software in order to make a real representation of the outer casing of the machine in order to represent the knobs used to operate the mechanics of the circuits.
We ran multiple tests in our research, and followed guidelines similar to those from our experiment report in Design Step 4. Below are the guidelines we followed to create our performance report, and our final document. The final document is the formal write up that my group and I created of the findings we encountered and our justification.
- Cover Page
- Abstract: (Communication) gives a quick, complete summary of the experiment and its conclusions. Less than 400 words.
- Table of Contents
- Introduction: (Communication and Critical Thinking) provides background and theory for the experiment; shows what the experiment will find and why it is needed. States Discovery Question. (“big picture” questions your report addresses become the focal point as you write your report.)
- Method: (Communication and Critical Thinking) gives a complete description of the apparatus, equipment, and procedure which was followed in the experiment. (include sketches)
- Results: (Communication and Critical Thinking) describe the data obtained when the method was performed; shows uncertainties. (graphs tables
- Discussion: (Communication and Critical Thinking) is your interpretation of the results and describes them like a story.
- References
- Appendix
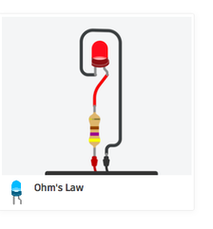
The final assignment of this design step was completing our Tinkercad tutorials. The simulation tutorials and software has become very important to my group as we navigate the possibilities of construction regarding our product. Tinkercad is an online rendering software that allow you to construct circuits/objects online. We worked on the tutorials listed below to improve our skills in online 3D modeling and circuit building. The following images are some still from a few of my lessons I completed.
Tinkercad Tutorials
Tinkercad Tutorials
- Introducing the Breadboard
- Ohm's Law
- Series and Parallel Circuits
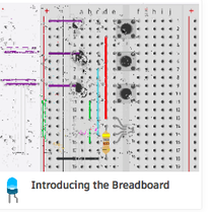
A still from my Tinkercad tutorial.
|
A still from my Tinkercad tutorial.
|
Reflection
This design step was very interesting. Two skills that I used really well in this design step was critical thinking and communication. The first skill that I used well was critical thinking. An example of when I used this skill well was when I was designing the buildable blueprints. I told my group that I would work on the 2D blueprints, and I would try to complete them virtually. However, I had no idea where to being on constructing this online and needed to think outside the box. I researched ways that I could design the blueprints, implemented them with our onshore document, and finalize the images. I really needed to work to figure out how to do this task, and I am proud of the work I did to figure out this new field area. The second skill that I did well was communication. A specific example of when I used this skill well was at the beginning of this step. Our group had limited time to complete this assignment, and it was important that we delegated the tasks. I made sure that my group and I sat down and talked about what jobs would fit each of us, so we could utilize all of our specific skills and passions to produce a great product. I was really happy with the way we continued working on this project, and our communication to make sure we put our best foot forward and divided the work efficiently.
I know there is always room to improve, and I defiantly can take this advice. Two skills that I still need to work on are creativity and collaboration. The first skill that I need to work on more is creativity. A specific example of when I missed the mark of this skill was in the middle of our work days. We were working on our performance testing report and my group could not figure out how we would perform the tests. I was very stumped, and we faced a lot of obstacles in our trials of finding the right method. We eventually found the right way to test of prototype, but I was disappointed at my lack of initiative to help fix the problem. In the future, I will make sure that I really think outside of the box and work with my team to improve the more creative thinking side of projects and assignments. The second skill that I still need to work on is collaboration. A specific example of when this lack of skill became an issue was at the beginning of our design step. My group and I split up the task and they were catered to our skillsets and passions to make sure we did the best work possible in each. However, I feel that we alienated ourselves from each other. We worked separately on many assignments/components, and did not collectively work together. For this assignment it worked in our favor, but in general we should be finding more ways to works a team; together. In the future, I will make sue my groups know that when we are a team, we must find ways to work as a team and obviously collaborate with each other.
All in all, this was a super interesting step in our design process. We are so close to finishing our semester, ad our STEM journey concluding. I am so nervous and excited for what to expect in our next set of assignments. The JEDD 2021.0 is an amazing product idea, and I am very eager to see it all finished and finalized in design step 8.
