In this unit, we covered a lot of content. We completed a lot of mini projects and two bigger projects during this past month. We went over circuits, electronics, breadboards, and programming. The main problem that my group and I faced was figuring out how we could use all of our time to the fullest to complete all of the projects included in this unit. The first thing that we did was we created a time chart of the coming weeks and worked off of that to plan our action steps. The main question we had to work off of was how will we incorporate all of these projects to create our bigger projects. We made sure to take careful notes and know all of the content of the lesson before we moved on, since it would have been more difficult if we were not one hundred percent on the same page moving forward. Below are descriptions of the projects that my group and I completed during this unit.
|
Circuits
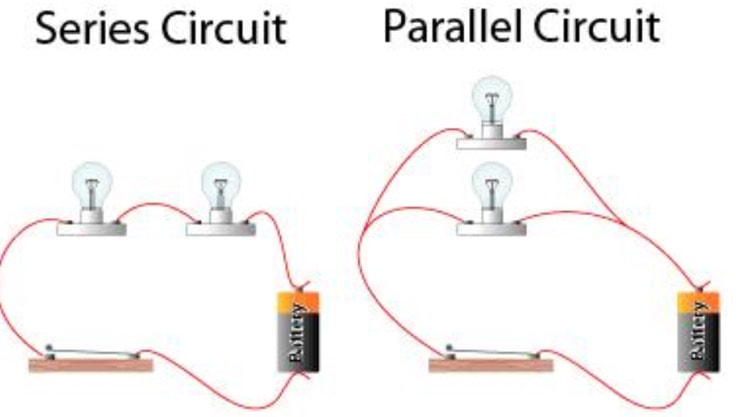
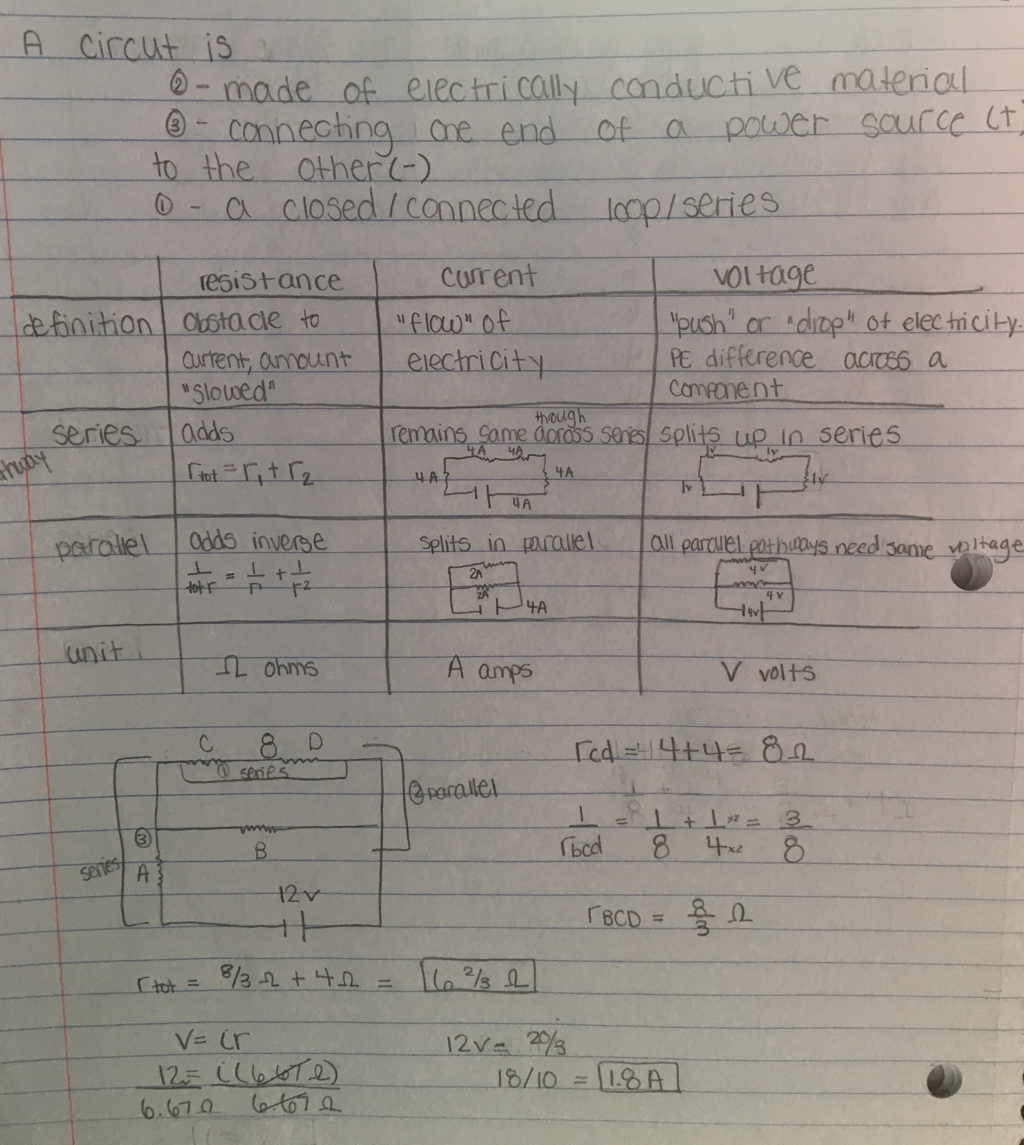
The first lesson that we learned as a class was circuits and the main ideas surrounding them. A circuit is a complete loop of conductive material from one side of a power source (+) to the other (-). The concepts that we learned are voltage ( V), current ( i), and resistance ( r). The voltage unit is 'V' which stands for volts, the unit for current is 'A' which stands for amps, and the resistance unit is Ohms. Here are some definitions of our concepts. Voltage- Potential energy difference across a component in a circuit ( the push or drop of electricity). The equation to find voltage is V= ir Current- The flow of electricity ( or charge) through a circuit. The equation to find the current is V= ir. Resistance- The amount the current is slowed or resisted through a component of a circuit. To find resistance use the equations r total= r1+r2+r3..... and 1/r total= 1/r1 +1/r2 +1/r3.... The first equation should be used for series and the second one for parallel. The other thing we learned was the types of circuits there are. The first circuit we learned about was a series circuit. This is a circuit where current must run through all components one after another. Some notes about series circuits are that the bulbs are dependent, the current in series stays the same always, the resistance is found by adding up all of the resistors together, and the voltage splits up. The second circuit we studied was a parallel circuit. This is two or more pathways that current can "choose" through. Some notes about these circuits are that parallel circuits are independent, the current flows through the pathway with the least resistance, current splits in parallel, the resistance is found by using the format 1/resistor value and continuing with the other resistors, and all parallel pathways need the same voltage. The right are some examples of parallel and series circuits and some notes my class took on the subject. |
|
|
Electronics/ Breadboards
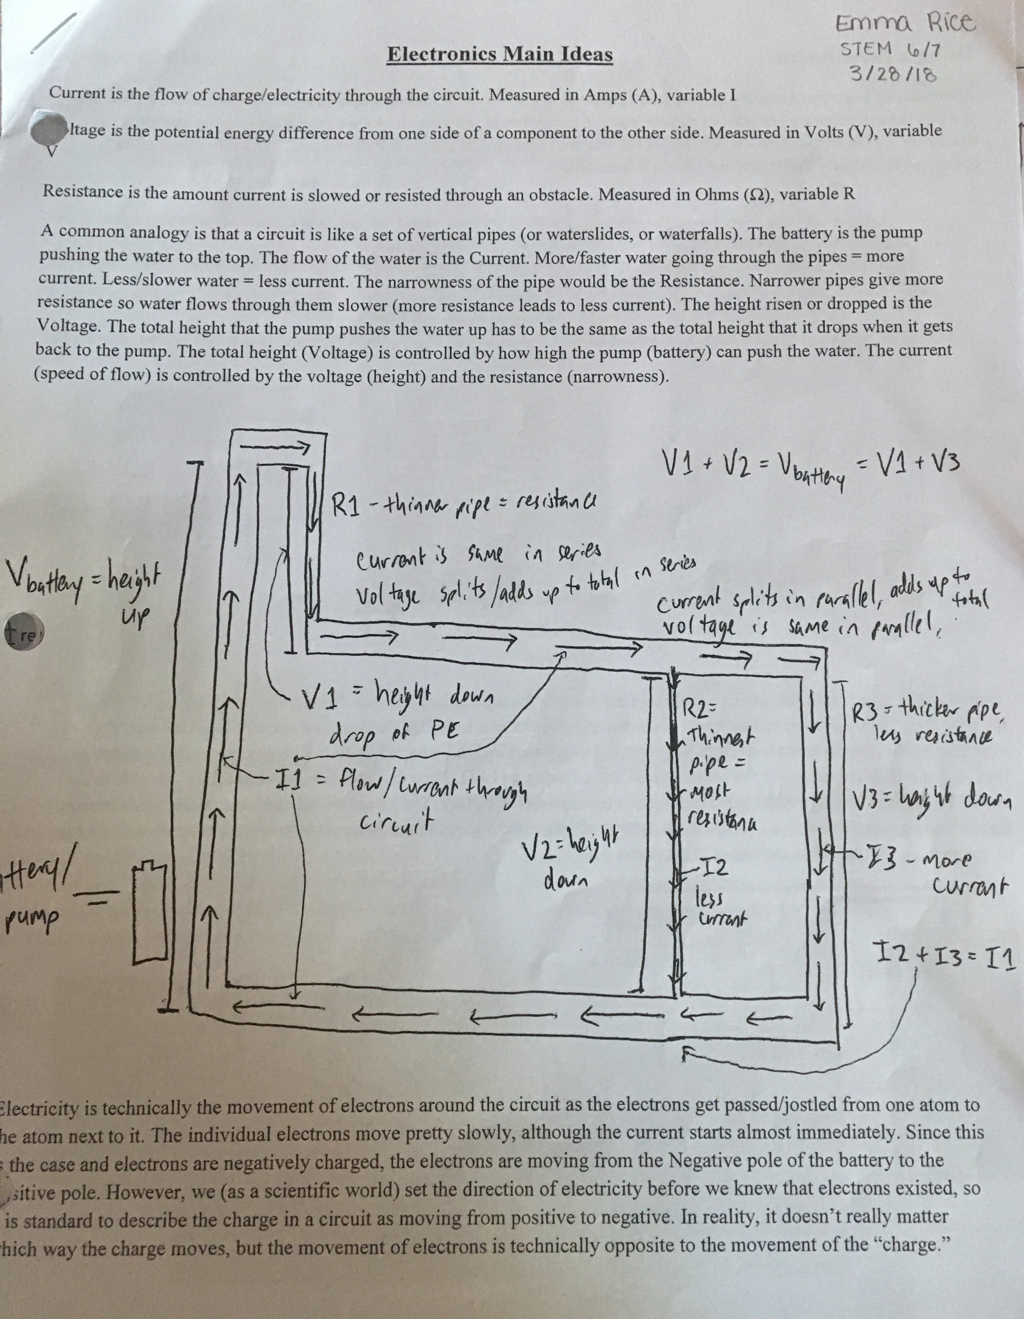
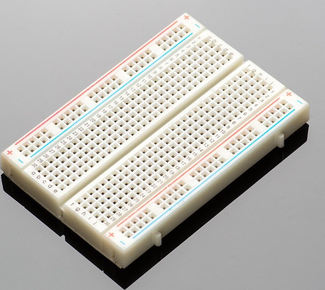
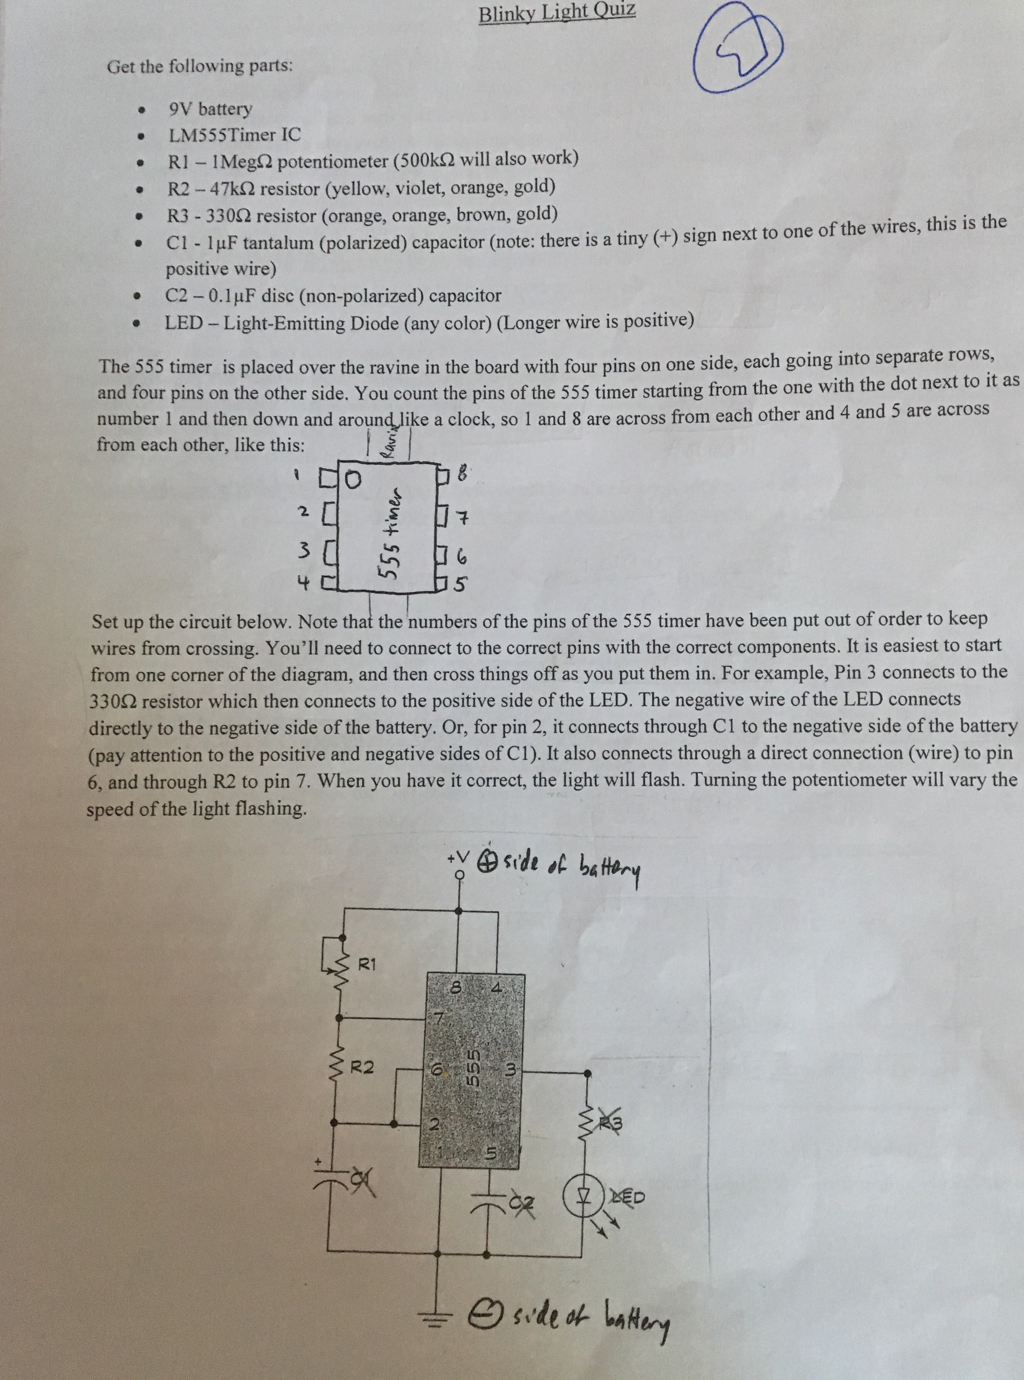
For this project we did a packet/lab full of experiments to complete that were about electronics and their main ideas. The whole lab was about proving the concepts given to be true by doing related experiments to that concept. The two main laws we were proving were Ohm's law and Kirchhoff's laws. Ohm's law was that voltage equals the current times the resistance ( V= ir ). This is correct and my partner and I proved this using the provided experiments and prior knowledge. Kirchhoff's laws have two parts; the current law is that the some of the currents going into a connection must equal the sum of the currents leaving the connection. The voltage law is that the sum of the voltages around a circuit must be equal to zero. Both of these laws are true, and we proved those through our experiments in the electricity main ideas lab the same way as how we proved Ohm's law. To complete the packet ( a page is shown to the left on the top) we needed to learn how to use a breadboard, resistor codes, using a voltmeter and ammeter. A breadboard is a way of making connections in a small space without making anything permanent. In short my partner and I made all of the connections we needed to complete/ prove our experiments on the breadboard ( picture on the left below packet picture). The next thing we learned was resistor codes. Resistor codes are an easy way to know how much resistance a resistor has or is capable of. A resistor has colorful stripes on them that correspond to the resistor code. The first three bands determine the value. The first color is the first digit of the number, the second band is the second digit of the number, and the third bad tells you what to multiply that number by or how many zeros to add to the end of it. For example a resistor with yellow (4), violet (7), brown (1), gold tells you that the resistor is 47 with one 0 on the end. That means the resistor has 470 ohms of resistance. Lastly we had to learn how to use a voltmeter, which measures the voltage in volts and an ammeter that measures the current in amps. Before we could move onto the next project my partner and I needed to prove that we understood the concepts and knew how to use all of the components above and other electronic parts. To move on we needed to pass the Blinky light quiz, which if done right will make an LED blink on and off. We passed this quiz, which was very challenging, and moved on to programming. To the left from top to bottom is our electronics main ideas (front page of our packet), breadboard, and description of Blink Light quiz with some notes. |
You may be wondering how these concepts all tie into each other, but they have more in common then you think. To move on to the next part of our projects, we had to know how to use all of the components above. The next part of this unit was programming, which is all about breadboards, electronics, and circuits.
Programming and Arduino ( Robot Art Show)
In this project, my partner and I learned all about electricity, circuits, and the basics of programming. Our final product was a functioning robot that read " Rainbow! :)" and connected to an LED that displayed a rainbow of colors. The major problem for my partner and I in this project was understanding the program we were working with, called Arduino. This program explained the sketches we were using, but since this was new territory for both me and my partner we had some set backs. The computer language was difficult to understand, so we had to take very diligent notes on what we would eventually be coding. To complete the project we worked up until the last minute we had to make sure our final product was complete and functioning. Some steps we went through to complete this project was taking notes as I mentioned before, doing electronics experiments so we could understand how the circuits would work, and creating our own electromagnet experiment to further grasp our knowledge of the task ahead of us. Below is a photo of the blueprint for our final product.
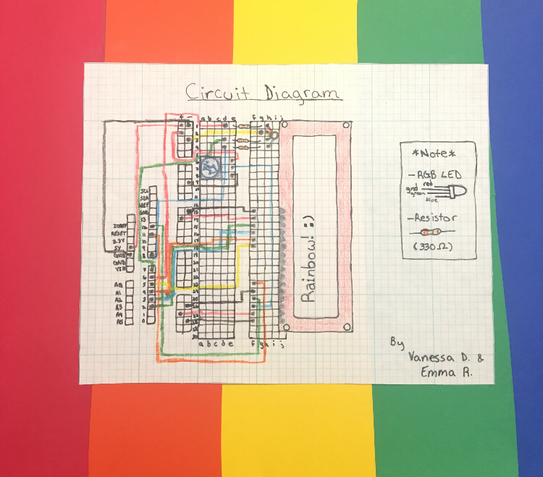
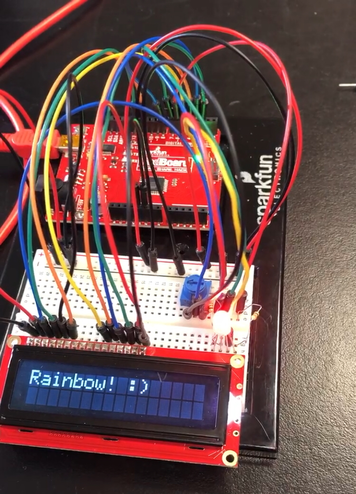
Our final product was a fully functioning robot that displayed the message " rainbow! :)" on an LCD, and also made an LED flash different colors of the rainbow. We presented our robot to our class with a brief explanation of how it works, what we did with our code, and then we successfully ran the robot for everyone. There are two main features of our final product, which are the LCD board, liquid crystal display board, and the LED that shows off a rainbow effect. The first feature of our project was the LCD board. This component of our robot displayed the message we wanted across the screen. In the code of our robot, which can be seen down further, it can be shown that we used lcd.print and wrote in our message. This is an important part of our project because it adds a sense of fun to our final product. The second feature of our robot was the RGB LED, which displayed a rainbow of colors. While it seems that a myriad of colors are being shown, they are all in fact different tones and shades of only three colors; red, green, and blue (RGB). This is a main feature because while many groups in our class created amazing robots, our group was the only one that used the rainbow LED, so it made our presentation a bit more interesting and made it stand out. Below are photos of our final product, and a description of our noted code followed by the code.
|
|
In the code below, my partner and I made detailed notes about each aspect of our robot and what that command does. Anything with '//' means that is our own notes we wrote and not part of the actual code, but everything else is part of the code and makes our robot run/work.
Reflection:
This was definitely new territory for me, since I have never done any programming prior to this project, but I am very proud of what I learned and what my final product was. Some skills that I preformed well were empathy and work ethic. The first skill area that I did well in was empathy. My partner for this project was someone who I had never really gotten to know before we began working together, and we became good friends through this project. One example of me showing empathy was when my partner seemed a little quiet one day so I asked if everything was okay, and we worked out the problem. The second skill area that I did well in was work ethic. This was a very stressful project for me because of the amount of time crunching we had to do towards the end. While it was stressful I feel that we worked through the hard times with great work ethic and positive attitudes. An example of when I showed good work ethic was when we were about to leave for spring break and i suggested that I take the blueprint home to work on over break so we could get some of the work load off for when we come back. In the end my partner and i ended up both finishing up the blueprint on our won time, but it really showed our drive to complete the project.
Like I mentioned earlier, this was a stressful project for me and my partner for many different reasons so not all of my skill areas were at their prime. Two skills I need to work on for the future are problem solving and time management. The first skill that I need to work on for the future is problem solving. An example of when this skill needed to be worked on during this project was towards the middle, where my partner and I needed to come up with a robot design, we went through a lot of different ideas but gave up easily when things got too complicated. Even though we got past this part of the project and became more passionate about of final design, it was still an issue. In the future I will have more drive to find a way around a tough problem. The second skill that I still need to work on is time management. An example of when this lack of skill became an issue was three days before spring break, and my partner and I still had to create or robot. We had spent a lot of time working on the sketches and not planned the actual project out, and it became an issue since we had only four more working days to complete the project. In the future I will make sure to create a time chart of our working days and make a plan early on as for what we will be doing on a specific day to avoid this situation of rushing.
All in all, this project was very interesting! It was for sure not my favorite project we have done this year, but it was a great experience. I learned a lot about how different careers work and what tasks people in those careers have to do. While I most certainly will not be a programmer, this project was still every bit as interesting and exciting as all of our projects are.
